Friday, December 31, 2010

YUMMY Breakfast Casserole for New Year's Day!

I made this for Christmas morning for
both sets of granparents and...
YUM-O is all I can say!

Breakfast Quiche

2 zuchinni sliced
1 french loaf of bread sliced in 1" pieces
1 small onion, finely chopped
3 tablespoons (or more) of basil
6 ounces of chedder/jack cheese, shredded
8 large eggs
2 cups of skim milk
1/2 tsp salt
1/2 tsp black pepper
2 tsp Dijon mustard
3-4 large tomatoes (depends on the size)

1. Preheat oven to 350 degrees.
2. Precook (stirfry) zuchinni and onion for 5-7 minutes.
3. Placed sliced bread in greased 9x13 inch baking dish.
Spread zuchinni, onion, and basil evenly over the bread.
4. In a bowl, whisk together eggs, milk, salt, pepper and mustard;
pour over vegetables. Arange tomatoes evenly over on top,
covering entire area.
5. Bake for 70 minutes, or until lightly browned. This dish can be refrigerated
overnight and baked in the morning. Makes 10 servings.


The last few days of Christmas Break

We're trying to squeeze in the last few days of fun
in 2010 (can you believe it's New Year already?)! Scootering in the beautiful sunshine after some heavy rains...
doing some jumping jacks on the trampoline at Open Gym
(gotta get those wiggles out)...

attempting a new gymnastics move...
I don't know if Simon liked this one...
(looks a little scared)!

And spent an afternoon fishing
for the Kids Fishing Derby...
Simon SURE learned what patience is!!!
Oh, how fishing is challenging for little children...
they expect to catch a fish-
NOW!
Not so much...

Simon walked away empty-handed...
but made a memory with Mom & Dad.
That's about it for 2010!
Happy New Year, friends!
Now go blog about some family memories of your own:)!

Thursday, December 30, 2010

Sweet Friend

The other day we picked up Cade
who JUST became a big brother!
Cade is Simon's little buddy...
whenever we have them out together,
people think they are twins
(must be the blondish hair & cute smile:)
As a treat to the New Big Bro,
we took him on a boat ride around the lake...
Yes, Simon IS steering!
Look out!!

Good buddies....
many memories...
lots of love for Caders.


We loved every minute that we spent with you that day.
Such precious memories for Simon
as he grows up and remembers the
little buddy days...
from fishing...
to Jingle concerts...
to playdates at the park...
to making brownies...
to Sunday School...
to Kids Club...
to rockin' out with the drums...
We love you, Cade!


We'll see you real soon,
sweet friend!

Sunday, December 26, 2010

Ultra EASY Felt Flower Tutorial

I have a few cute sweaters that just needed a little
"POP"!
So for the Christmas season,
I made a couple Super SIMPLE felt flowers that
you can make in about 10 minutes for about 50 cents.
First, free cut about 12-15 small circles
(about 2" in diameter).
Then cut ONE bigger circle
(about 3" in diameter).
Take your hot glue gun
and glue a small amount in the middle of
EACH small flower,
pinching it in the middle to adhere the felt together.
The circles should look like the ones shown below.

So you will have every small circle glued in the center,
and the BIG circle as is.
Next, begin to hot glue a small amount around
the edge of the larger circle,
placing each smaller (scrunched) circle down.
You will glue each scrunched circle
along the entire edge of the larger circle.
Then you will continue to glue in the center of the larger circle,
until the entire large circle is filled.
Start on the outer edges and work your way into the center... Once completed, your flower should look like this.
You may have to trim the edge of the flower
so that it is even.
Once you are done with that,
hot glue a pin (that you can buy from Michaels or a craft store).
Then glue a small piece of felt over the pin's base,
leaving the pin on top.
This will secure the felt onto the pin's base.


Then find a plain 'ol sweater and place accordingly...
you choose where you need a little spice.
These pins look great on a
sweater,
shirt,
scarf,
belt,
or even to a purse!

Have fun!!!

'Lil Jingles 2010

Every year, the 'Lil Jingles perform
at our church...
these cutie-patooties
know how to sing, let me tell ya.... they melt your hearts as the Christmas Carols
are belted out at the top of their little lungs...
Here's an example of Simon singing...
although he gets a little distracted
by his buddy, Eli,
who really wanted to emphasize
"Christmas Day"....

Hope you all had a
VERY MERRY CHRISTMAS!!!

Wednesday, December 22, 2010

7 Years...

Seven Years...
ups...
downs...
twists...
turns...
joy...
sorrow...
valleys...
mountain tops...


Through it all,
we had the Lord at every point...
He never left us,
and always sustained us.
Happy Anniversary, my sweet beloved Dave!
Thank you for walking out this life with me...
And thank you Lord,
for blessing me with my
husband and friend!


Saturday, December 18, 2010

'Tis the (BUSY) Season...

Well....
as most of you are experiencing,
this has been a C-R-A-Z-Y couple of weeks!
From birthday celebrations, to playdates,
to preschool parties, to volunteering,
to Christmas Extravaganzas....
everybody is in the same boat-
the BUSY boat!
But all is good...
Here's a re-cap of Family Fun...
Little Sime celebrated his 5th birthday on Wednesday.
We had a couple buddies over for some
ice cream sundaes
and some Christmas Light touring to the winners
around our beautiful city.
Started with a little prayer for my boy...

Saw some Clark Griswold Christmas Lights
(AMAZING)...

and enjoyed a sweet bithday time with
two great buddies...
Thank you for making Simon's birthday so special and memorable!

The next day,
he was blessed by his teacher and Principal...
what a treasured memory to celebrate with his first
Preschool class (ever)...


His teacher, Mrs. Summers,
has been absolutely remarkable!
Hats off to ALL Preschool Teachers
around the world!
They do SOOOOO much for our children...
and we thank you!

Simon performed in his first Christmas Play EVER...
He was SO excited to be a Wiseman,
with his cousin, Ryan!!
They both did a great job saying their first line (in public)!!
He's come a LONG way since the
days of screeching in public,
to speaking a line in a play.
Good Job, buddy!

Excited...
just minutes before the big moment!
Thank you to Grammy & Pops for coming
and supporting little Sime!
We love you!
And a few seconds to pose...
Isn't it true....
Moms barely get in any pictures with their kids!?!
They're always behind the camera, aren't they?!

And we ended our week
with 15 beautiful kids from church
at our house...
no damage done...
no spills...
no one hurt...
lots of giggles...
lots of sqealing...
lots of smiles...
LOTS of memories for these little cutie-pies!

Tomorrow is the big day...
Introducing...
The 'Lil Jingles!
They may look tired,
but this was after three practices of their Christmas songs...
Can't wait to hear them on their big day!
Gotta Love every second of this
B-U-S-Y,
CRAZY,
Season!

Friday, December 10, 2010

Super Cute, Super Easy Burp Cloth

Try this cute Burp Cloth as a gift for the
newbaby in town...
First, get some soft, fuzzy fabric,
and TWO fun cotton prints to make the burp cloth. Next, cut the soft fabric in your desired size.
Mine was 6inches x 12inches.
Then, cut your TWO fabrics in 3 equal sizes
that will match your backing.

Next, sew up the 3 strips.
These strips will be in alternating colors.


They will look like this (below)...
these fabrics are the same brand
and compliment each other well.
Next, place the backing (right side facing right side)
towards the sewed up cotton fabric.
Pin along the edges,
leaving one side open.
Then sew up the three sides.
Then, turn the last end under and pin.
Then sew along the edge....
but don't stop there...
Sew the open edge up,
then keep sewing around the other three sides,
creating a nice edging for the burp cloth.
I added some regular rick-rack down the middle for some flair!

And made a matching bib to boot!

Love this set!!
The burp cloth cost pennies,
took me less than an hour,
and is a SUPER cute gift to bless the new baby in town!
Have fun!!

Thursday, December 9, 2010

Creative Wrapping

I am known to always make my gifts for
birthdays, showers, Christmas, and any other occassion...
But...
I never have the right packaging or wrapping on hand! Here's a fun way to spice gift wrap...
Try using some old fabric for a change of pace!
This gift was for a baby boy.
I got some vintage car fabric that was hidden in my stash,
some twine,
and a long strip from some old curtains that were in my craft bin.
And....Tah-Dah!!
Something fun to try when you're in a pinch!

Sunday, December 5, 2010

Easy Onesie with Leg Ruffles Tutorial

Here is an easy sewing project for
that cutie baby girl on the way...
First, find fabrics and a plain onesie.
Next, choose a design for the front.
I chose a Queen's crown that will show
the girly-girl off.
I traced my image to the back of No Sew Adhesive Bond.
I ironed it to the fabric,
cut it out,
peeled off the backing,
place it in the middle of the front of the onesie,
then ironed it on.
My final stage was to sew around the edges
to make sure it was fastened tightly to the onesie.
Then, I got the same fabric and made two strips
(each were 4 inches x 14inches).
I folded them right side to right side,
then sewed up two of the sides,
leaving one end open.
I used a chopstick to pull the right sides outward.
Then (as shown below), I sewed up the last end,
by turning ends inward,
and sewing straight across.
My finished look was two strips,
with the right side fabric facing outward.

Next, I began pleating the fabric
along the base of the onesie,
from one snap to the other snap.
The picture below shows this process.
Lastly, after both sides are pleated and pinned,
I sewed straight across.


Voila! All done!
After a little press with the iron,
the pleated ruffles add a little spice to a plain 'ol onesie.

Easy.
Simple.
Cute.
Love it!


Friday, December 3, 2010

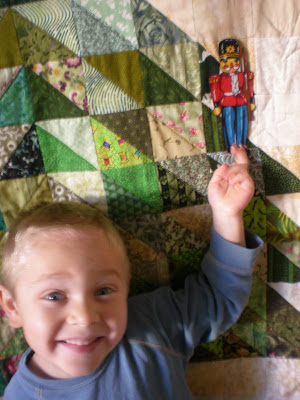
Advent Quilt

My mom handmade this beautiful Advent Christmas Quilt
for Simon.
It hangs in our diningroom on a quilt rack. Inside a special pouch,
there are 25 fabric ornaments that Simon
gets to put on the quilted Christmas tree.
This ornament marks December 1st...
and every single morning...
the first thing Simon does...
is RUN to his Advent Quilt
and puts the ornament on
as a countdown till Christmas.
THANK YOU, Grammy,
for this precious Christmas gift for lil Sime!

Thursday, December 2, 2010

Home Grown...

Tah-Dah!
This is our first Christmas Tree that we've had since
we had our little boy
(5 years ago)!
Our little one bedroom was way too small
to jam a tree in there the past five years,
so we always got a table-topper tree from
Trader Joes...
the one that is about 8 inches high?....
you know the ones...
Well...
This is the one we got when Simon was a baby!

This is Pops, Simon's grandpa.

He planted it in his yard...

and boy, did it grow!!

Soooo...
my manly hubby took an electric saw and cut it down last night!
Our first Christmas tree as a family!
He pruned it and...

trimmed it...
then we took it home....

and decorated it...
We love it!
It's SUPER spindly-looking,
and is missing the back half
(the tree was growing against a wall, so it's literally half of a tree-
there are no branches on the other side!)
It works just fine...

Simon said, "Mom, this doesn't look like a real Christmas tree!"
Well, I beg to differ...
It IS a real Christmas tree...
and we're proud of it!
However...
next year we'll be going to Home Depot
and buying one of theirs:)