Tuesday, July 6, 2010

A Little Favor...

Remember this cute little bubsies number
that was featured in Canadian Family Magazine????
Well...I have a question for you bubsies viewers...
before I ask, let me explain...
I have NOT been promoting any sales lately
because I have been BUSY with my little Man,
but I am hoping to get a few bites in the next three weeks...
***
We are signing up Simon for Vaction Bible School
and I would like to sell at least 5 onesies to get him in AND...
I would like to sell another 5 onesies
and SPONSOR a child who is in financial need
to go to Vacation Bible School....
SOOOOO....
If anyone would like a BowTie onesie ora Mr. Man Long Tie onesie...
please email me at bubsiesboutique@yahoo.com.
Onesies are $10 each
OR $18 for 2 (one of each- bowtie and long tie)...
Shipping is $4.

Thank you so much for your support...
and I will keep you posted!

Sunday, July 4, 2010

Happy 4th of July!

I LOVE Trader Joes!!!
We had a traditional July 4th BBQ with some friends,
and it was the easiest and yummiest menu...
ALL from Trader Joes!
Good 'ol corn, watermelon, chips, salsa,
hot dogs, and baked beans...
wrapping it up with a frozen chocolate covered banana!
Cheap, easy, and delicious!
Enjoy the holiday everyone and...
take time to be THANKFUL that we are in
a country that has FREEDOM,
unlike so many other countries in the world!
We are a blessed Nation...
don't forget it!
Blessings to all of you and yours!!

Cute,Easy Headband Project

This little headband is so easy, and super cute!
Here's how you make it...
First, trace any shape of flower on your
TWO favorite fabrics, plus one each on burlap.
Make 4 big ones,
and 4 small ones,
plus 2 burlap flowers.
The more fabric, the fluffier it will be.Next, take this plain, black headband...
and cover it with ribbon of your choice.
Hot glue the tips of the headband,
then use hot glue throughout your wrapping process...
just to keep it secure.

Assemble your flower with hot glue
and using alternating fabrics,
starting with large on the bottom,
and ending with small on top.
Put the burlap flower somewhere in the middle.
The key in assembling the fabric flower is to
put hot glue between each layer,
then TWISTING the flower as you press.
This will give the flower some dimesion.
Find a really cute big button and hot glue
it in the middle.

After that, fluff the layers for a few minutes,
which will give it more dimension as well.

Hot glue a small piece of burlap on the back of the flower,
leaving an open space to...

slide the headband into.
All done!

You can make several flowers
and interchange them according to your outfit!
Have fun!!

Friday, July 2, 2010

The Girls...

We Miss You Already,
Girls!!Wishing you the VERY best that God has to offer you
in your new home and community!
You will never be far from our hearts!!!
(PS...Chloe...you play "hard-to-get pretty well:)
Love you, Girls
(and Hamid)!

The Boys

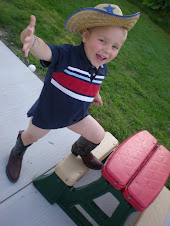
Simon is 4 and a half years old...
and this is certainly the summer
of growing up!
From riding his bike...
to swimming lessons...
to hangin' with The Boys (his cousins)... This is the first time where we go places,
like the Lake, and I don't see him for four hours
because he is playing and having so much fun!
Praise the Lord for independence (finally)!!!
Love it!
Boy...they really do grow up fast!
Savor every minute, Mommies!

First Swim Lesson

Simon had his very first swim lessons...
EVER!
He has NEVER liked going under the water,
so I knew we had to conquer that this summer...
or else!
For his first time...he did awesome!
The swim teachers sure don't mess around!
They jump the kids right into it...
and don't give into fears...

it's working!!!
Little Simon and I went to the pool after his lesson,
and he actually WANTED to go under
for the first time ever!
We love swim lessons!!
Stay tuned for more progress....


Sunday, June 27, 2010

A Dining Treasure Project

I have seen this projects on several other craft sites,
so I thought I would share it with my viewers.
I can't take credit for this cute craft,
but I can show you how to do it!
First, get a really cool frame from a thrift store...
mine was $1 at a garage sale!
Fit burlap fabric so that it fits on the inside. Dig for your grandmother's old treasured silverware.
This is the most beautiful set that HAD to be displayed
from Dave's grandma who is 98 and still with it!
Finally, hot glue the silverware in the style
that you want it displayed.
Voila! Super simple...
and VERY special!

This will be hung in our dinigroom along with
grandma's tea cups and other cherished treasures.
I love it!

Wednesday, June 23, 2010

Recycled Old Dresser turned Book Shelf!

See this cute little nook in Simon's room...
the Book Nook?...Well... DAVE took this old dresser...
and turned it into THIS!

My amazing hubby got the "crafty" bug and did this
ALL on his own
(even some of the blog pics)!
First, he took an old dresser
and sawed off one of the beams that made the drawer.
This created TWO bookshelves, instead of three small ones.
Next, he took the bottom of the drawers and cut them up into pieces...
and made them into shelves with a secure bottom.
Then he Mod Podged old maps on the two bottom shelves...
this was totally HIS idea!
It matches Simon's room because one whole wall
is covered in maps!
He painted Mod Podge overtop of the maps to make a sealer on them.
This will help the books not rip the maps as they
are put on and off the shelves.
One of the previous steps was that Dave Spray Painted
the shelves to match Simon's room colors
in a dark red.
SO cute with maps!
All done!


The two top drawrs were left in for Simon to use
with little trinkets and what-nots...
you know how 4 year-olds collect things:)
Here's Daddy and Simon with the finished product.
I am SO proud of the way it turned out!
GREAT job, Dave!!!
It was a fairly simple project
(about 2 hours max)...
and super cheap because this dresser was free!
Try this at home!!

Tuesday, June 22, 2010

First Progressive Dinner...but not the last!

I had the privelege of being a part of a progressive dinner
with 6 other couples.
There were 3 houses,
all representing a group of different countries,
where our dear friends will be traveling to for 4 months...
yes, 4 months!
The first stop was our stop...
the Middle eastern countries.
Falafel sandwiches,
variety of hummus,
Israeli olives,
and a cucumber salad w/mint.
Here are the beautiful hostess for the evening!

We heard authentic Chinese...
(good job, Jen)!
Her hubby is behind trying to interpret;)


We heard some rules that are followed in
Africa, China, and Indonesia...
boy, it sure makes you thankful for the freedom
and blessing we have here!

We heard a Russian prayer...
that's my partner in a leopard Snuggie!

Saw a little Tango from a cute couple who took it
seriously...
his face shows the intesity of the dance!

A gorgeous display of the desserts...
that was ridiculously delicious
(and added some lb's to my behind)!
It was worth it!
ALL for this AMAZING couple!
You deserved every second of this precious evening!


Cheers to the Nortons...
You inspire,
You encourage,
You bless,
You are a gift to all of us!
Not one day will go by
without a prayer for your incredible journey abroad!

Don't Say Your Not Crafty!

This is my sweet friend, Rachael.
She says she's not crafty... I beg to differ!
Loved our crafty time, friend!
You did
FABULOUS!

Sunday, June 13, 2010

First Concert EVER....

We bought our tickets two months ago,
and Simon has been counting the days!
The OC Supertones were playing at FishFest 2010...
a Reunion for this awesome Christian Ska Band.
Believe it or not,
Simon actually loves the HARD stuff...
rock, ska, and anything that twangs with the guitar and
beats hard with the drum...
SOOO NOT like his mommy!
Dave and Simon were off and running to the gates
of the big concert...My VERY FIRST concert too...
and I am SO thankful to have gone with my two boys!!


We were honored and blessed to hear Jeremy Camp..

meet up with some friends...
like little Max who is ridiculously adorable
dancin' and hangin' out with Dean-O and the Dynamoes!
Daddy dancing with Simon
(and his orange earplugs!)

Finally....
the long awaited...
OC Supertones!!
If you haven't heard their music...
go listen NOW!!
Thank you to our buddy, Tony and the whole crew for
an amazing concert...
and bringing glory to GOD!

"There's No life away from Him.
There's NO joy away from Him.
There's NO peace away from Him.
There's NO life away from Him."
-The OC Supertones
That's right!
There IS NO peace, joy, or LIFE away from Jesus!

Word Art Tutorial (number 4)

I'm tellin' you...
this Word Art craft is SO
easy, fun and inexpensive to give as a gift...
and special, I might add!
Here we go...
First get an old piece of wood from your yard or fence.
Next, drill two holes in it,
then put wire through it to hang at the length of your choice. Then, trace the letters you want displayed on scrapbook paper.
Cut out and arrange on the wood to see what it looks like.
I traced my letters backwards on the blank side of the paper
because I chose dark colors that is hard to see lines on.Next step is to rip edges of paper on all four sides to fit your sign.
Leave a little wood showing on the top and bottom.
I used two different pieces of scrapbook paper that blended well together.
I overlapped them to fit the wood and word that I chose.
After that, Mod Podge under the paper to adhere it.
You may have to use a book overtop of it to make sure it stays down
without bubbles.

Then, Mod Podge under the letters to adhere them.

Brush Mod Podge overtop of the letters as the last step.
This will give the sign a coating and makes sure all the
letters are securely on the wood sign.
Finally tie a bow with corresponding colors on the wire
to add a little flair.
All done!
Happy Birthday, Erica!
You are a BIG BLESSING in our lives!!