Monday, May 31, 2010

20 Minute Table Runner Tutorial

I needed to spice up an old hope chest
in my livingroom that we use as a coffee table...
this is a good one!
First, get some old fabric and cut to the size you want.
My fabric ended up as a long rectangle.
I folded the rectangle fabric in half (length-wise).
Make it right side to right side.
Then sew up 2 of the 3 sides,
leaving one opening.
After that, turn inside out with the right sides now facing you.
Then, tuck a little bit of the sides inward on the open end...

and pin across.
Then sew up that last side.
This will leave you with all the sides sewn up
and a plain table runner.

Next, get some jumbo rick-rack,
tuck under one end and pin across the width
on both sides.

Then sew it up along the curved edges to keep it from curling up.

All done!

You can put beverages, snacks, or just leave it as is...
super cute...
and super fast!
Have a great day!!

Friday, May 28, 2010

Lessons from a 4-year-old...

Why do we
bring Simon to the homeless shelter?
Based on these pictures,
you can see why we do...
The ladies at Isaiah's House LOVE him!
What kid wouldn't love moms and grandmas
blowing bubbles...playing cards...
and spending time with him?
We love seeing Simon SMILE when
he is with these wonderful ladies.


But do you know what we love even more?
Is that Simon can bring a SMILE to their faces...

He has NO idea what the real life of a homeless person is like...
he doesn't judge them...
he doesn't ignore...
he doesn't walk past...
He sits,
he plays,
he hugs,
he giggles,
he acts silly,
and makes these ladies feel treasured.
That's what I love about children...
they are innocent and unknowing of a lot that goes on in the world...
but they sure know how to show LOVE, don't they?
We can learn a lot from them...
Can't we?

Wednesday, May 26, 2010

Super Simple Recycled Shirt Tutorial

One of my faves so far!
Here we go...
First get a plain V-Neck T-Shirt at Target for $6.
Cut up an old shirt in small and medium circles
in the same color (or not).
All I had was black,
so I made it work!
Next, pinch circles together
with one side longer then the other.
Start at the shoulder and begin
pinning them on the shirt overlapping each other.

I pinned the circles thinner at the shoulder,
then got a little fuller towards the V part of the neckline,
then thin again.

Then I sewed them all on in a zig zag.
Basically, I moved the shirt back and forth in the sewing machine.
I went over the circles about two times in different derections
to ensure they were all secure.
I'm wearing it as we speak...
and I love it!
My favorite part is that is adds dimension to the shirt,
as well as gives it some flair to spice your outfit up.
Happy Sewing!

Better Than Broadway!

For the last year and half
we have spent time with a wonderful group,
called Lighthouse.
It has been one of the most amazing experiences for our family...
especially Simon!
These pics are from their Mock Rock
where they get up and perform different songs,
kind of like an Air Guitar.
It's the BEST show ever...
better than a Broadway Show!
They sing...
They dance...
They are FULL of JOY...
and seeing them makes you walk away
full of joy too...
and so thankful...
and so blessed!
Thank you to ALL of the Lighthouse Crew
and their wonderful leaders!
We are richer in our hearts because we know you!

Monday, May 24, 2010

If You Give A Kid a Drum...

he's gonna make some NOISE!

Sunday, May 23, 2010

Learning New Things...

I know...
I know...
I should have helped Simon ride a bike sooner,
but we kind of stayed with a tricycle up till now.
So....
this weekend we got him all set up with his very own
bike (from his cousin)
and big boy helmet. It takes a lot of training...
a lot of cheering on (from his cousins)...

an even a few brakes to let others ride...

but we're getting there...
slowly, but surely!

Save Your Jeans!

Here's a great way to SAVE your favorite pair of JEANS!
If there are holes in your jeans, then try this project...
First, turn jeans inside out.
Next, iron on No-Sew Adhesive Bond to a square of two fabrics.
ONE of the squares will be seen through the hole in the jeans.
So you will have TWO equal squares...
one of them will be seen,
and the other square will be ironed to the back
(like the picture below).
Then, you will place your squares of fabric over the hole on the INSIDE of the jeans.
Turn inside out and PIN over the TOP of the jeans
(like the pic below).
At this point, you will have your hole covered from the inside,
but you will have it pinned from the outside so you can stitch.

Next, take some thick embroidery thread (4-5 strands)
and begin stitching a basic stich around the hole.
It doesn't have to be perfect!
The messier...
the better!

All Done!
These pictures aren't perfect,
but you get the idea!


Instead of ratty 'ol holes,
you have some cuteness to show off...
and get to keep those comfy, cozy, worn-out,
favorite pair of jeans!

Thursday, May 20, 2010

Ribbon & Lace

I tried a new technique today...
a little ribbon around the neckline,
and some lace at the base...
something' a little sweet for Baby Faith.
Happy Birthday, Sweet Girl!

Monday, May 17, 2010

Easy Re-Fashion T-Shirt

I bought a fun green shirt at Old Navy
for $1.25 and wanted to spice it up a bit.
Try this little project for yourself...
First, get your t-shirt and fabric.
I always choose fabric that has hints of the same color in it.
Cut a strip of fabric (3.5"x 25")
Fold (right side to right side).
Then sew up 3 of the sides.
Use a chop stick to turn the strip right side out.
Then sew up the fourth side.

Next, begin folding and pinning the strip
along the collar, or V-Neckline.
Start at the shoulder and work your way down
to the length you want.
Fold it like you would when you make a paper fan
(kind of like an accordian).
Then sew in the center of your strip
with matching thread.
I used a double stitch to ensure it would stay.

All done!
The project took about 20 minutes and cost less than $2.
I personally love it!
You can make your strip any way you want.
You can creat a flower or zig-zag
or whatever design suits your fancy.

A great way to add some flair to a plain ol' T!


Thursday, May 13, 2010

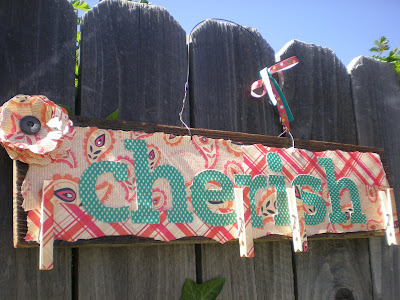
Picture/Note Holder

This sign can hold notes, cards and photos.
It's super cheap and super easy!
The tutorial is a few posts down...
the only difference is that I added a
paper flower for some spice.Have fun, girls!

Ribbon Flower Headband

This little headband cost about $1.20!
Headband was in the Dollar section at Target.
The ribbon was left over from some crafts.
Just take one side of the wire out on the ribbon
and gather.
Then hot glue it on a backing (like cardboard).
Glue it in a circle,
till the flower gets fuller and fuller.
You will end in the middle of the ribbon flower.
Tuck the middle in and hot glue it down.
Then glue it to your headband.

Go try it!
Happy crafting!


Sunday, May 9, 2010

Pretend City with the Cousins!

It was a sweet Mother's day weekend...
one that I won't forget!
One of the highlights that blessed me was seeing sweet Simon
PLAY hard with his cousins at Pretend City.
Ryan and Simon are 5 months apart and
absolutely LOVE each other!
From driving through town...
to cookin' in the kitchen...
these two had a ball!


Simon takes after his daddy and has a love for the
field of Science...
I was a little nervous he would squeeze my arm too hard...
explains the scared facial expression!

Dave saying, "I LOVE you, Jeanne!"
Just what I needed to hear this weekend;)


Oh, am I one thankful Mommy!
May EACH and every Mommy who sees this blog post
be BLESSED beyond measure!
You are valuable, loved, adored,
and cherished by your beautiful child (or children)!
When you get tired and weary...
go take a breather...
then come back...
look at your miracle of life...
and squeeze and love the heck out of 'em!
Children are a blessing...
PERIOD!
Happy Mother's Day!