Showing posts with label projects. Show all posts

Wednesday, January 12, 2011

Upcycled Glass Bottle Project

So sorry I haven't updated my blog lately!!
Here's an easy Up-cycling project to try...
You'll need a funky old glass bottle,
twine,
a glue gun,
and a strip of fabric.Begin by using hot glue to stick the twine
on the bottle.
Start at the base, and glue a little bit at a time,
laying the twine on the glue...
repeat all the way up to the desired height on the bottle.
Be sure to use about an inch or two of glue at time,
and not more,
because the hot glue will dry.

I went up to the neck of the bottle...
I may add more twine later up to the lip,
but for now, I wanted to experiment.

Finally, I added a double-layered strip of fabric
that was cut with pinking shears on the edges.
I tied it around the neck of hte bottle,
to add some color to the neutral twine.

Then, I placed it on the mantle next to a cool beachy picture,
that picks up the colors in the twine and fabric.
It cost pennies,
took 20 minutes,
and adds a little somethin' to a naked mantle:)
Happy Crafting!!


Sunday, December 26, 2010

Ultra EASY Felt Flower Tutorial

I have a few cute sweaters that just needed a little
"POP"!
So for the Christmas season,
I made a couple Super SIMPLE felt flowers that
you can make in about 10 minutes for about 50 cents.
First, free cut about 12-15 small circles
(about 2" in diameter).
Then cut ONE bigger circle
(about 3" in diameter).
Take your hot glue gun
and glue a small amount in the middle of
EACH small flower,
pinching it in the middle to adhere the felt together.
The circles should look like the ones shown below.

So you will have every small circle glued in the center,
and the BIG circle as is.
Next, begin to hot glue a small amount around
the edge of the larger circle,
placing each smaller (scrunched) circle down.
You will glue each scrunched circle
along the entire edge of the larger circle.
Then you will continue to glue in the center of the larger circle,
until the entire large circle is filled.
Start on the outer edges and work your way into the center... Once completed, your flower should look like this.
You may have to trim the edge of the flower
so that it is even.
Once you are done with that,
hot glue a pin (that you can buy from Michaels or a craft store).
Then glue a small piece of felt over the pin's base,
leaving the pin on top.
This will secure the felt onto the pin's base.


Then find a plain 'ol sweater and place accordingly...
you choose where you need a little spice.
These pins look great on a
sweater,
shirt,
scarf,
belt,
or even to a purse!

Have fun!!!

Friday, December 10, 2010

Super Cute, Super Easy Burp Cloth

Try this cute Burp Cloth as a gift for the
newbaby in town...
First, get some soft, fuzzy fabric,
and TWO fun cotton prints to make the burp cloth. Next, cut the soft fabric in your desired size.
Mine was 6inches x 12inches.
Then, cut your TWO fabrics in 3 equal sizes
that will match your backing.

Next, sew up the 3 strips.
These strips will be in alternating colors.


They will look like this (below)...
these fabrics are the same brand
and compliment each other well.
Next, place the backing (right side facing right side)
towards the sewed up cotton fabric.
Pin along the edges,
leaving one side open.
Then sew up the three sides.
Then, turn the last end under and pin.
Then sew along the edge....
but don't stop there...
Sew the open edge up,
then keep sewing around the other three sides,
creating a nice edging for the burp cloth.
I added some regular rick-rack down the middle for some flair!

And made a matching bib to boot!

Love this set!!
The burp cloth cost pennies,
took me less than an hour,
and is a SUPER cute gift to bless the new baby in town!
Have fun!!

Sunday, October 24, 2010

Simple Seasonal Tea Towel Tutorial

Okay Ladies...
here's another simple gift that you can make
for pennies,
and give away as a gift.
Here we go...
First, get some fabric
and some shapes of seasonal items
that you want to put on your tea towels.
I chose simple, triangular Christmas trees
and holly with berries.
I bought a 5-pack of flour sacks,
otherwise known as tea towels...
there in the dish towel section at Target.
Wash and iron the flour sacks FIRST.
Then, trace your holiday items onto Heat N Bond.
Next, iron the Heat N Bond to the fabric.
Then peel off the white paper backing
(like this picture shows).
Next, iron the fabric
(with the sticky side facing the flour sack).
I made a triangle tree and added a small brown trunk.
For the holly,
I traced it out of a Christmas book,
and followed the same instructions as above.

After your items are ironed on,
sew along edge with your sewing machine...


like so!
Then add some jumbo rick-rack
and pin underneath the holly.
Sew that up on both ends.
Don't forget to tuck both ends under on both sides
and secure with sewing machine
to avoid fraying.


I actually sewed the rick-rack by going up and down
in the curves.

Iron afterwards,
and you are DONE!

These are really nice gifts for...
Teachers,
Hostesses of Holiday Parties,
Parents,
Grandparents,
and Friends.
If you don't feel like sewing,
I have a few left!
$6 Each
or 2 for $5
Email me if you want them
and I'll send them your way!
Happy Sewing!

Monday, October 18, 2010

EASY Personalized Name Sign

This craft is super easy and under $2 to make!
First, take an old piece of wood from somewhere in your house...
this is an extra shelf that we didn't use
in our entertainment center.
Dave cut it in half and spray painted it white. Next, I cut out letters that spelled 'Lauren,'
which makes this sign nice and personal.
Then I Mod Podged the letters onto the sign.
Next, I painted a layer of Mod Podge over the top of the letters
to make a coating and adhere them to the sign.


Finally, Dave drilled holes in the top &
put wire so she could hang it.
Next, I added an accent ribbon at the top
and made a paper flower for the corner.
I hot glued the flower layers togther,
and used Gorilla Glue to stick it to the sign.


All done!
This is really a great idea for birthday gifts,
or any occassion that you need to bring a present.
If you have the supplies around the house,
get Mod Podge on sale at Michaels,
then you should be good to go!
Happy Crafting!

Saturday, October 2, 2010

Happy First Birthday!

Sorry it's been awhile ladies!
I've been BUSY with life and haven't done many projects.
Here's a REALLY cute and easy baby girl gift
that you need to try!
First, take a plain onesie (minus the teddy bear in the corner). Get your Heat N Bond and some fun pinkish fabric
for the (birthday girl's) crown.
Trace the crown on the Heat N Bond,
iron it to the fabric, &
cut it out.
Next, do the same technique with the Number One
(because little baby girl is turning ONE)!
Place the One where you think looks cute.
I placed mine over the teddy bear (of course).
Then I placed the crown in the middle of the One,
just to make it look a little more balanced
on the onesie.
Then iron in place.
Next, you will sew in light pink thread
overtop of the One and the crown.
This washes nicely and will stay put on the onesie.
The onesie is done...
onto the Tutu.
Take some one-inch elastic.
Measure it to the baby's waist.
Then make it one inch smaller, so it won't slide down.
Sew a little square on the tips of the elastic.
This will secure it in place.

Next, take strips of tulle in the length you want to make the tutu.
Double that size because you are going to fold it in half,
and make a slip-knot to secure it on the elastic.
This pic shows what the waist band should look like
with the tulle in a slip-knot.


Finally, tie a little bow in ribbon to the elastic.
Or you can glue gun a big flower,
or whatever other embellishment you would like.

Here's the finished tutu...
cute, huh?!

I added some iron-on rhinestones to the tips of the crown
on the onesie...
some bling for the babe.
The total outfit is very inexpensive,
quick to make,
and looks cute for a little cutie's
first birthday.

Happy Birthday, Miss Alyssa!

Thursday, September 16, 2010

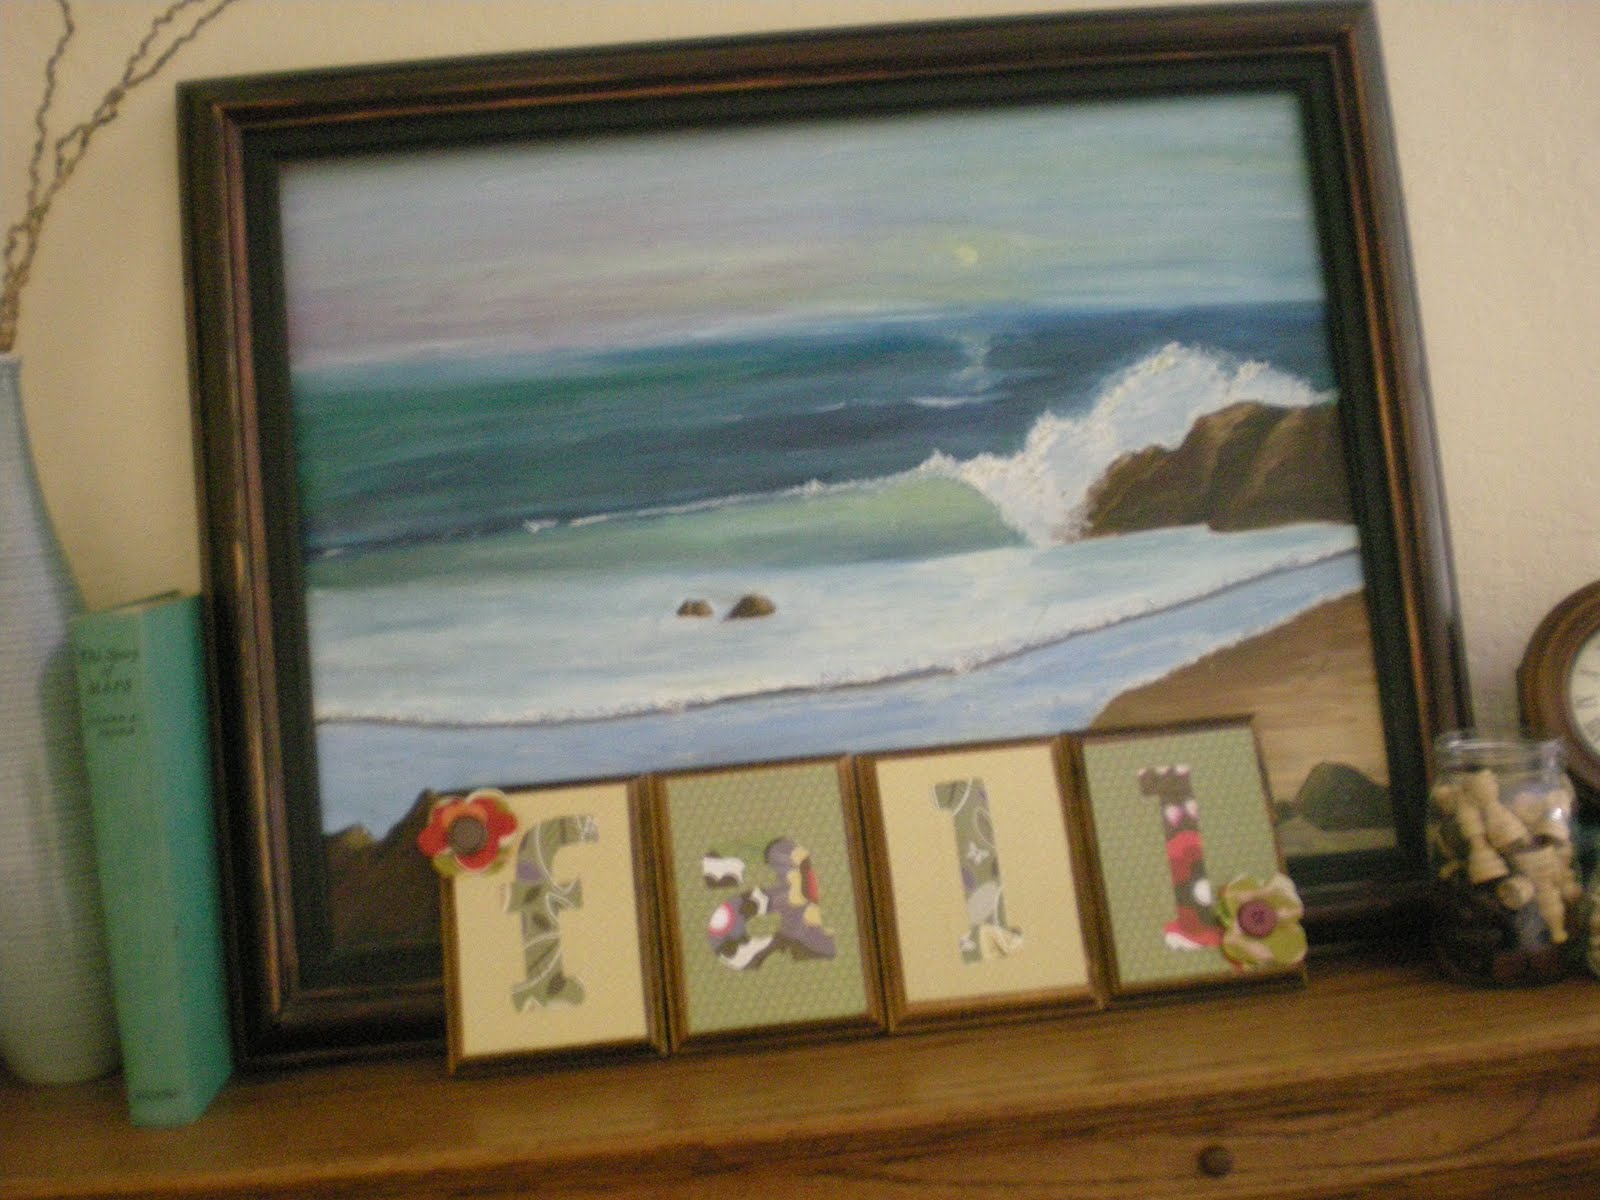
Handmade Fall Decor

I got some awesome scrapbook paper from
my good friend, Hannah (a fellow crafter).
It was perfect for a Fall craft
to spice up my mantle.
First, I took 4 small wood plaques
and fall-themed paper.
Next, I used the sold colors to cover the front of the plaques
in alternating colors.
Then I used the floral paper to make the letters,
that spelled "fall."
The next step was to Mod Podge the back of the paper
onto the front of the wood plaques.
Then Mod Podge the letters onto the paper
in alternating colors.
Next, Mod Podge overtop of everything
and let dry for a few hours.

Finally, I got some cute fabric
and cut out basic flowers.
I hot glued the fabric flowers on top of one another
to give it dimension.
Then added a button for the center.

All done!


Sorry the pics aren't great,
but you get the idea.
Hope you like it!
Try it at home for this Fall season,
then stick it away for next year.

Enjoy!

Thursday, September 9, 2010

Upcyled Baby Jar Project

This project was super easy AND nearly free!
First, take Mod Podge, food coloring, and empty baby food jars. Pour a small amount of Mod Podge on a paper plate
and add a few drops of food coloring.
Mix it up well...
Then paint the outside of the jars,
painting in all directions
(up/down & sideways).
Let it dry overnight and then you are done!!

It creates a stain-glass effect and it really is beautful.


Put a candle inside and it creates a nice greenish tint glow!
Tie some raffia and ribbon and you have yourself a
beauty of a gift OR
keep it for yourself.
Place a trio set indoors...
or outside on your patio table.

Seriously...
they look even cuter in person.
I think I found my new favorite craft!
Enjoy and Happy Crafting!