Wednesday, April 7, 2010

First Family Movie Night

I know...I know...
I should have done this earlier,
but we just had our FIRST Family Movie Night!
I am usually cleaning, sewing, crafting, cooking, or blogging
when Simon watches a movie....
but I STOPPED (almost)...
I did a little painting craft RIGHT next to them.
(It's hard for me to settle down and just watch a movie)! Anyway...we had a BALL!
"The Incredible Journey"...
LOTS of snuggle time...
yummy snacks...
a mellow boy for 84 minutes...
and a FUNNNN memory for little Simon.

Family Movie Night...
go have one!

SUPER Simple Hair Clip Craft


I love crafting with little girls!
I got to do some simple crafting with our friends this week.
Here's something to try at home
with your daughters & friends!
Supplies:
Hot Glue Gun
fabric scraps
pinking shears and/or regular fabric scissors
bobby pins
buttons or "bling"
First, cut 4 large circles (about the size of a drinking cup).
You can use pinking shears to make it edgy looking.
Then, cut 4-6 medium circles...
and about 4 or so small circles.
Then Hot Glue all the circles together,
going from largest to smallest on top.
HINT: after each piece is glued, give it a little spin
with your finger to the right (keeping it in place).
This will give it a fuller look.
ALSO...
the more circles, the fuller it looks.
Next, glue the button or "bling" in the center of the smallest circle.
Finally, glue the circles to a bobby pin,
or stitch it to a hair rubber band as a ponytail holder.
Voila! All done!
A Super Easy 10 minute craft...love it!
Thanks for modeling, girls!

Monday, April 5, 2010

Seeking...

Seek... and you shall find.
But...
keep your eyes upward...
the prize is Eternal!

Happy Easter, dear friends!
HE IS RISEN!!!

Thursday, April 1, 2010

Jewelry & Accessory Holder Tutorial

Isn't this cute??!!Just kidding!
I bought this u-g-l-y picture at a garage sale
and turned into something useful and super cute!
Here goes...
First, take the "rose" picture out of the frame.
Next, staple burlap over the frame backing...

like so...


Then, get a ribbon and some jumbo rick-rack
that have the same color theme.
I chose red because this is going to go in my bedroom,
just outside the bathroom.
My main colors are red and brown...
the burlap and red rick-rack make this rad!

Next, I hot glued buttons on either side of
the ribbon and rick-rack.

Finally, I put some of my barettes and hair clips
on the ribbons...
put two nails at the top for my necklaces and...
project complete!

I love this!!
It works perfect as a jewelry/accessory holder...
PLUS it's just cute to look at!
(fyi...I made those fabric hair clips on the rick-rack)
You can make this project however big or small you want.
Happy Crafting!!

Wednesday, March 31, 2010

Mr. Man...for reals!


Sunday, March 28, 2010

Bubsies Boutique in a Magazine....Eh?

I am honored to have been asked
to feature one of my favorite bubsies items
in Canadian Family Magazine!
I don't know HOW they found me,
but I am so grateful for the "pub" that
bubsies boutique got in April's issue. Mr. Man Bowtie Onesie was on the Table of Contents Page...and got a pic in their
"Alice in Wonderland" photo shoot.
THANK YOU to the cute baby model,
and the wonderful Fashion Editor who chose my
teeny-tiny, incy-wincy,
handmade baby goodie!


The best part is...
that my Mom and Dad are from Canada,
and ALL my extended family lives in several places
in that beautiful country, where I learned to say...
EH?!

Wednesday, March 24, 2010

Word Art Tutorial (number 3)

Well....
You've seen this before.
Word Art!
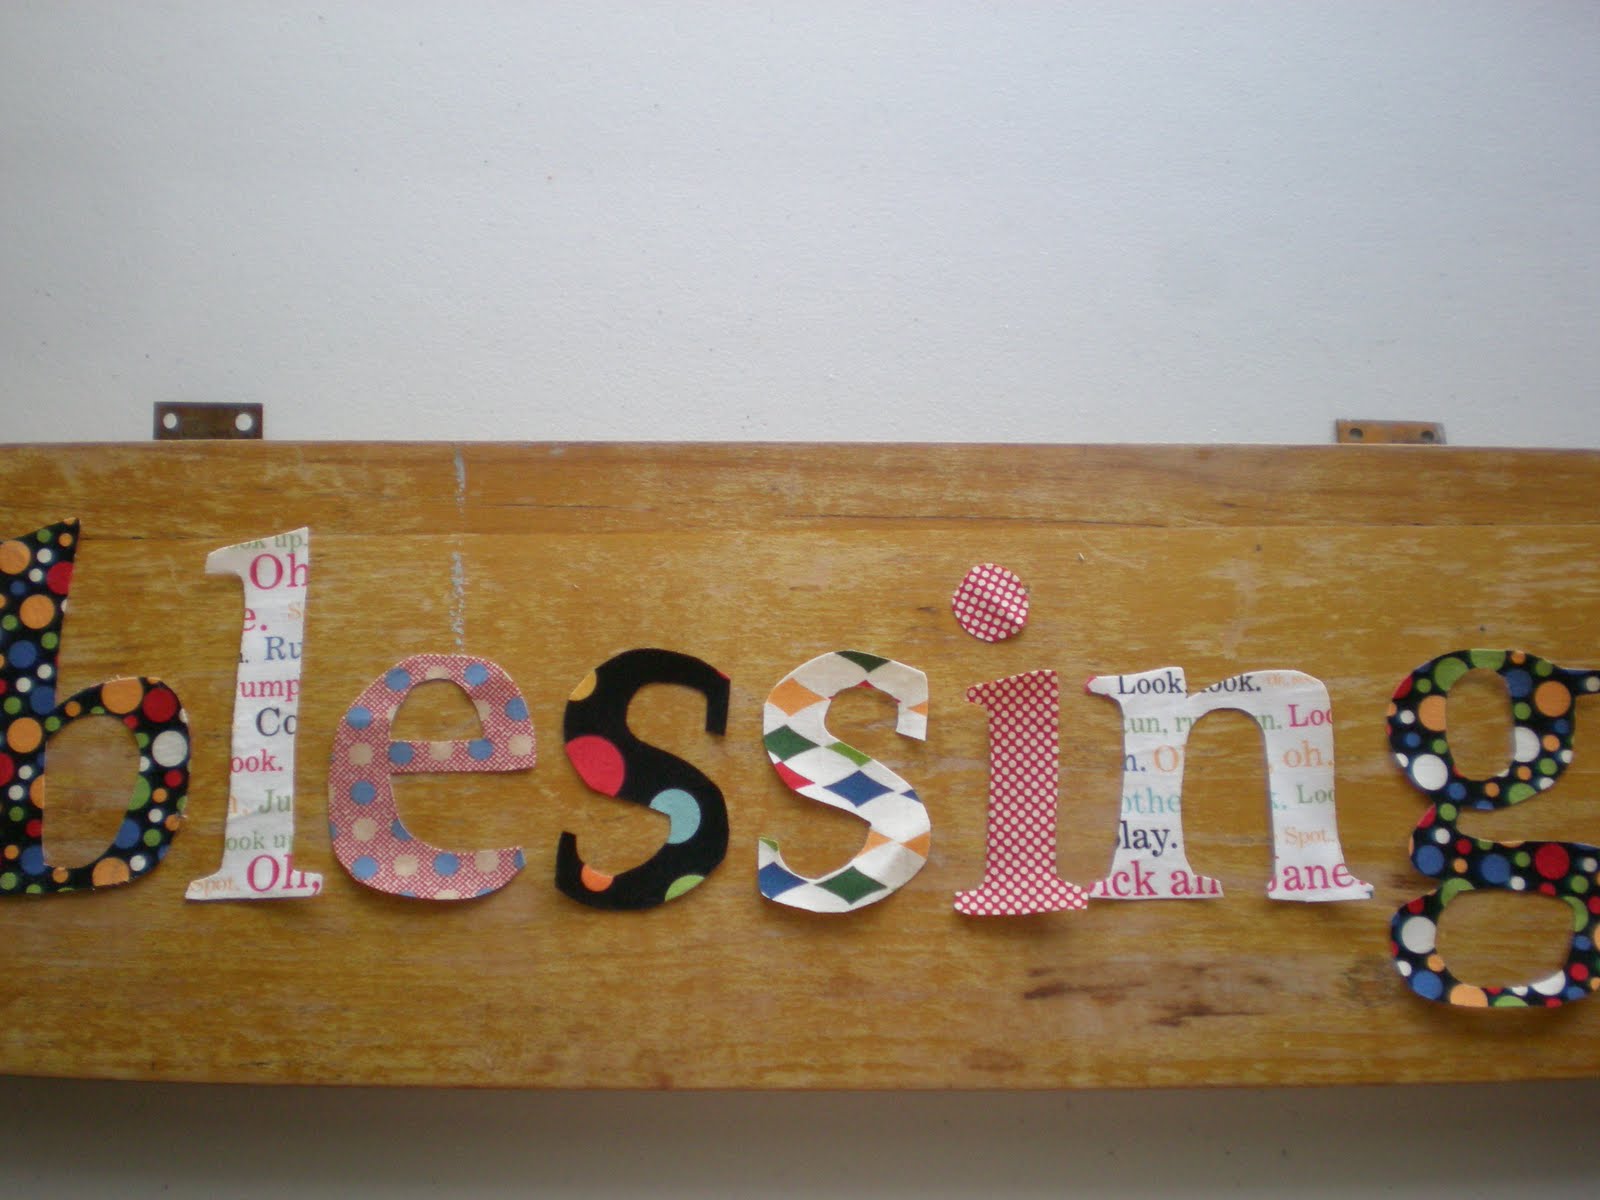
I did a mini tutorial with one side of an old table in my kitchen
that was falling apart...
well, this is the other side.
The hinges were rusted, falling off,
and PERFECT to reuse in a craft!
First step...
find a font you love.
Next, trace the letters on fabric or scrapbook paper.
You will probably have to do it backwards
so the letters will turn out the right way.
I used fabric for this project.
HINT** It was actually very time consuming because I hand traced
the letters, then ironed them with an adhesive bond to make it stiffer.
Oh...I made a short project...
super long!
I hear there is a great invention called "The Cricut?"
Go buy it!
My method is basically free,
but you need about an hour when you deal with
hand-tracing on fabric.
Anyway...
next step is to Mod Podge each letter on you board or piece of wood.
Paint a layer of Mod Podge overtop of the finished product.

I used a Matte finish...
and I love it!
This will go in my lil' Man's room...
a blessing he will always be!

Monday, March 22, 2010

Tea Towel Gift

After our Swallow's day Parade,
I got inspired!
Happy Birthday, Heather!Hope you dry lots of dishes with this!

Fishing Fun

It was exactly 7 years ago that my romantic hubby
proposed....on Lake Mission Viejo!
Yes...my engagement ring was our tackle box!
We tried to explain that to Simon...
he said, "was I in Jesus' brain when you did that?"
I said, "Well..actually...Yes, you were."
What an insightful little guy!
Anyway...
we like to take him to our
FAVORITE place on earth...
no, not Disneyland...
the LAKE!Simon loves playing with the worms...
so do his adorable cousins!

In fact...
I tried having Dave take this picture,
and Braden was too engrossed in his worm stash...
while Simon was trying to grab the fishing pole away from me!


Oh...how we all love to fish.
Well, the kids actually liked the worms the best,
but we say they liked fishing.


One if Simon's favorite lines of the day...
"This is NOT fun, Mom!
We're not catching anything."
"Well I know Simon.
A REAL fisherman is patient."
That is a HARD concept for a 4 year-old.

Waiting can be hard for grow-ups too!
But...I was reminded yesterday...
The Lord is good,
to those who wait upon Him.
- Lamentations 3:25

We never caught any fish...
but they didn't mind by the end of the trip...
they still had their worms:)

Saturday, March 20, 2010

Good Times

We had our first family day in long time today.
Good Times!
Started with a parade
in San Juan Capistrano for Swallow's Day...
what an event!
Of course, Simon's favorite part was the Marching Bands.
His eyes were glued to each and every drummer that walked by. Especially the Mustang Drummers...
Holy Toledo!
They were so unbelievable that they brought tears
to my eyes!
It was like watching STOMP...
with an extra kick!

Came home after the parade...
hit a few balls...

and ate a perfect summery snack...
watermelon!
It was worth putting off my list of to-do's for the day.
Fun Times...
Good Times!

Thursday, March 18, 2010

St.Patti's Scavenger Hunt

We had our little friend, Archer, over for a little
St.Patti's Day activity.
I found this great scavenger hunt
on-line that lead the boys around the house
with cute, easy clues.
Archer really like to stop in between clues to
munch on some treats...
At the end of the hunt,
was a little bag of pennies and a lollipop.
Check out the site...
fun game to do with your preschooler!

(Another) Mod Podge Frame Craft

So as you know,
I had 3 frames in the IKEA pack...
I had to come up with something in
reds and blues to go in Simon's room...
(i'll post a pic once they're up).
Here's a fun craft to try if you

have about 10 minutes:)First, get your supplies (above).
I used 4 strips of fabric,
in two colors that complimented each other.
I cut them with pinking shears
about 1"x 20".
Next, I Mod Podged the frame.

Then, I began to wrap the fabric strips around the frame,
over the Mod Podge.
I smoothed the fabric as I went around the frame.

After I finished one strip,
I moved on to the second strip,
and overlapped a bit
so you couldn't see the wood.
After that,
I Mod Podged over the entire frame,
once it was wrapped on all four sides.
This created a solid, smooth,
Matte finish, that was a bit stiff and sturdy.
Depending on what type of Mod Podge,
you can have a shimmery or matte finish...
whatever floats your boat.
And Voila!
I put a SWEET picture of Simon
when he was a baby in black and white.
Stay tuned!

Wednesday, March 17, 2010

Love to See them Learning

We took a trip to the Discovery Science Center
with our good friends,
Emma and Chloe.
We LOVE field trips!! Dave is a High School Science teacher,
so Simon (seriously) takes after him.
"Why do we have ankles?
Why are our teeth hard?
How come we have toes...fingers?
How do kites fly?....
What is the street made out of?
Where does sand come from?
Why do we have seasons?
Why does the weather get hot...get cold?


Where does the food go after you eat it (no joke)?!
Why do we pee?
What are these for (pointing to his personal parts)?

Oh the questions Simon asks!
Half the time,
I just say..."I'm not sure about that...
wait till your daddy gets home."
And then I feel stupid because I really don't know the answer!
UUGH!
I feel like I've lost IQ points since I've become a mommy...
the more questions he asks me,
the more I realize how much I don't know!
The good thing?....
Simon IS learning...
that's the point.
He can keep asking me WHY questions all he wants.
Seeing his brain turn, think, and process
is the coolest thing I witness being a mommy.
I just have to do a little more homework
so I can actually answer him!


Monday, March 15, 2010

Fun Frame Craft Tutorial

I found the cutest frame project on
I followed her tutorial,
but put a little twist to make it my own.
Check her blog out when you get a chance!
To make mine,
I got a 3pck of IKEA frames ($1.67)!
I took out a poem titled,
"Simple Simon"
out of a Mother Goose Nursery Rhymes book
that is about 30 years old.
(FYI...I'm sorry, but Mother Goose is
seriously creepy! You should read some of those
nursery tales sometime...
sorry Mother Goose)!
Anyway...
I painted slightly over the poem,
but left some wording with Simon's name in there.
This is for his room,
so I thought it was cute.
I let it dry...
you'll see what I wrote later on.
Then, I painted the frame red...
and sanded it down.
Once the cream paint dried,
added some red and blue (to match his room).
Let it dry.
Then I added and changed my own
Super Hero wording for my sweet boy, Simon.
Gotta love our little men in our lives...
future Super Heros for sure!
Train 'em young!