Monday, March 8, 2010

Fun, Silly, Easy Project

This seems silly,
but I actually got the idea from a fabulous book,
"One Yard Wonders."All you need is Mod Podge, a small pice of scrap fabric,
a paint brush, and an old scale that needs a little
fixing up!
I laid the fabric over the black portion of the scale.
Then I traced and cut.
Next, I Mod Podged the black surface of the scale,
and laid the cut piece of fabric on top.
I smoothed it out till it was wrinkle-free...
all done!
Super simple...
Kinda Silly...
but it gave me something to do,
and spiced up my bathroom
with a little splash of color.

Big Bro...Lil' Sis

Congrats to the new baby in town!


Thursday, March 4, 2010

Cheap and Easy Gift

I had some aprons left over
and wanted to put them to good use.
I decided to whip up a
little Dish Towel,
buy some dish soap,
and add it to my apron gift. These two sets are going to my beautiful sister-in-laws
for their shared birthdays. You could always do the same
for the sweet sister, mama, auntie, or friend in your life.
I think I'm going to add a little cookbook
to each set.
Michaels sells GREAT, cheap cookbooks for
$5 or less (plus a coupon in Sunday's paper).
Gotta think creatively and resourcefully these days!


Wednesday, March 3, 2010

Growth Chart Tutorial

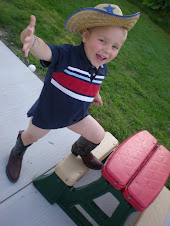
Simon's little buddy is having his 3rd birthday soon.
I decided to make a Growth Chart
in a Western theme
because he has some fun vintage
Western knick-knacks in his room.
Here goes the tutorial on how I made this CUTE gift!
First, I took two different colors of fabric
and measured them 18" wide x 29"tall.
I sewed them right sides to right sides,
leaving one side open.
Then flipped them inside out.
Then, I found some clip art of a boot
and a horseshoe.
I traced the two on a
No Sew fusible web.
Once I traced the Western items,
I made numbers 2-4 for the height aspect of the chart.


I cut them out and peeled off the back.


Here are the letters for his name in a
fabric that accompanies the theme.
After everything was traced and cut,
I ironed them in place on the growth chart.

Then, I made 3 small strips of fabric
for where the dowel is going to go through.


I took my chart and folded the edges inward
and ironed them down.
Next, I took the strips,
folded them in half and stuck them inside.
Then I pinned and sewed ALL four edges up!

Archer's name looked better on some courderoy
that I had on hand.
It contrasted a little more.
I just pinned the courderoy rectangle
and sewed it on the top of the chart
(no fusible web required for this, except the letters).

Here are some pics of the numbers
and the Western shapes.

Numbers 2-4 were measured from
small strips of fabric that I placed a foot apart.
Number 2 was placed about 2.5" from the bottom.
Number 3 was placed 14.5" from the bottom.
Number 4 was placed 26.5" from the bottom.


I cut a dowel down the appropriate size.
I glued buttons on the end
with a hot glue gun.
I also glued ribbon (to hang the chart)
on both ends.
Here it is!
It's cuter in person...
in my opinion.
You can hang the growth chart
so that it measures 2 feet from the floor.

We hope you like it,
little buddy!
Happy Birthday!
And I hope you guys can follow this tutorial...
you can measure and trace things however you see fit.
I don't think there is a wrong way to make this!
Good Luck!

Tuesday, March 2, 2010

FREE Time

I had to do a few things around the house today...
the usual for a stay-at-home mommy.
So I had Simon keep busy with
whatever we had in the house...
you know...
toys, coloring, books...
Well, he chose an old box I was throwing away.He spent almost an hour trying to rip it apart
into small pieces.
Pretty typical for a boy!
He ended up making a
"cymbal" for a make-believe drum.
Pretty good for an hour of pretend play!

Then...
he collected rocks for his rock collection.
(Thank you, Lord, for our yard!!!!)
Then he smiled for my constant camera in his face:)

Next, he dipped the rocks in the water to clean them.

Brushed them with a tiny brush he took from
daddy's shaving kit.

Then dipped them again.
All clean!!!
I got to work for about two staright hours...
and he's still going as we speak!
It's funny....
you can buy your kids all the toys and gadgets that you think
they'll play with.
And then they end up having more fun with
FREE STUFF
that you have around the house!!
Whatever works!?!

Saturday, February 27, 2010

Pink and Brown Onesie Dress & Burp Cloth Gift Set

Another custom order for the
new cutie-patotootie in town!
I am not really making too many burp cloths these days,
but rather love sewing bibs.
But... you can find super cute burp cloths at
Rags to Stitches.But I sure love to make these onesie dresses!

Let me know if you like what you see!
This fabric is out, but I've got more selections on hand!


Friday, February 26, 2010

a little date...

Is this what Simon is going to look like
in the future with his "love?"
I don't know...
but they sure are cute now!

Thursday, February 25, 2010

Another Word Art Tutorial

I know...I know...
I'm addicted to this Word Art stuff
has featured in the past.
I love that you can take a WORD that means so much to you...
and create something
awesome for your home.
First, I took this piece of old wood that was attached to a
vintage table that we bought years ago.
It was literally falling off the table,
so we kept it for something useful to use in our new home.
It still has the hinges on the top
(see above) that we will use to hang it in our livingroom.
Next, I took good 'ol Mod Podge
and some leftover scrapbooking paper.
Then, I did my usual with this Word Art Craft...
I printed out the font that I wanted,
traced the letters (backwards),
and cut!
Finally, I Mod Podged the letters on my old pice of wood.
Then, I painted a layer of Mod Podge over top after the letters
were dried and set in place.
And tah-dah!!!!
I LOVE this!!!!!!!
It will go in the perfect spot in our livingroom,
where all can see this beautiful word,
"rejoice"!
Philippians 4:4
"Rejoice in the Lord always.
I say it again, rejoice!"
I chose this word because I am rejoicing daily at our
new home,
our health,
our family,
our church,
our lives,
and every blessing that we take for granted!
There's a LOT to rejoice about...
so go shout out loud a word of praise
and thankfulfulness...
REJOICE!

The Cupcake Club

I am so impressed by Dave's high school students...
they started a group called,
"The Cupcake Club." They put together an awesome birthday
for children who are in
a time of need financially.
The children have wonderful mommies
who care for them,
but this Club provides a birthday celebration
that would not be possible
without financial and group help.
The high schoolers provide
cupcakes, drinks, party favors, games, music, and
presents!!!
The children LOVE it!!!
It's kind of like
"kids serving kids" in a way!
We were honored to be there and support this
amazing Club!
I especially liked seeing Simon's eyes light up
when the birthday kids got their gifts!
The children were BLESSED...
and I think these high schoolers were blessed just as much.
I hope my little guy can have a
heart to serve like these students!
Gotta train 'em young...
to give to others, serve with your whole heart...
and expect nothing in return!
Thank you to those "big kids" who were a true example
of giving with your hearts!

Monday, February 22, 2010

Hiding healthy foods

I'm sure all of you have seen this book,
"Deceptively Delicious."
It's AWESOME!
Many of the recipes require a few more hours in the kitchen
to prepare the foods,
but it is worth it...
IF you want your kiddo to eat veggies and fruits.These don't look very appetizing,
but these Rice Balls were a HUGE hit with Simon!
I had to share her recipe
(that I modified for Simon's sake).
Rice Balls
1/2cup brown rice
3 tbsp olive oil
1/4 lb. chicken
1 1/4 tsp. salt
1/8 tsp pepper
1/2 cup (your choice of steamed veggie)...I used cauliflower
1/4 shredded chedder cheese
1/4 cup lowfat buttermilk
1 large egg
1/2 cup spinach or broccoli puree
1 1/2 cups breadcrumbs
HERE'S HOW I MADE THEM:
Blended cubed, cooked, chicken
and steamed veggie in "Magic Bullet"
(or blender of your choice).
Combined puree with brown rice and seasoning.
I didn't add the dairy because Simon has
food allergies. But they still turned out super yummy!
I stirred ingredients together and
formed balls. Dip the balls in a bowl
with the beaten egg.
Place in pan over medium heat
with olive oil at the bottom.
Let brown on one side,
then flip. Cook thoroughly...
maybe takes 5-7 minutes.
The Rice Balls should be warm, browned,
and crisp on both sides.
Simon devoured them!
Sometimes I have to spend a couple hours in the kitchen preparing
healthy, yummy foods in bulk.
It takes up a lot of time,
but it is worth it!
You can always freeze the left overs
and use them for another day
when you just don't have a thing to eat
in the house!
Enjoy!

Canvas Bag Word Art Tutorial

What do you do with a plain 'ol canvas bag?
Create something crafty, of course!
My creative friend, Kelly, gave me the idea
of putting words, like "Read, Books, Learn..."
on her son's library bag.
Well...since I'm obsessed with Word Art,
I had to try it out to see if we could have another
Craft Day with this little project.Here are the basic steps:
First, print our a favorite font in Size 200.
Next, flip the paper over and trace the letters
of your chosen word with
Heat N Bond Ultrahold (No Sew required)
iron-on adhesive.
Make sure you trace on the smooth size.
The letter you are tracing is actually backwards (for now).
My trace job, stinks!
But you get the idea.

Then, iron your letter on your favorite fabric,
on the wrong side of the fabric.
The print will be facing the ironing board.

Here's the letter "r"
on a camoflage printed fabric that Simon picked out.
Next, cut out letter and peel off the paper on the back.
Place letter on your canvas bag and iron on
the word you chose.
In this case, I chose "Learn"
because that's what we try to do when we go to
a library:)


After I ironed on my word,
I cut out stars that were freehand drawn.
I like when things aren't even and perfect
because then I don't feel bad when I make mistakes!

A plain 'ol canvas bag,
turned out pretty cute...and useful too
as we tote some heavy books from our favorite hang-out spot...
the Mission Viejo Library.
FYI...
I made this bag while chatting to my buddy, Misty...
it's a no-brainer craft, cheap on the budget,
fun to do while multi-tasking,
and can be done to spice up a useful accessory!
Hope you get a chance to create today!!